

Application Programming Interfaces (APIs) function akin to concealed passages, facilitating communication among diverse software programs. However, just as not all doors should be opened by everyone, not every software should possess unrestricted access to all APIs.
These APIs serve as the backbone linking various platforms, from banking apps to social media favorites, managing sensitive data and executing pivotal tasks.
In the absence of stringent authorization measures, APIs risk exploitation, potentially resulting in breaches, service interruptions, and erosion of user confidence.
API authorization acts as a vigilant guardian, ensuring that only designated software wielding the appropriate credentials can unlock access and utilize the resources within. Effective API authorization transcends mere security; it cultivates a fluid and secure user journey, guaranteeing that sanctioned applications access personal data exclusively and operate within their allotted parameters.
Understanding API Authorization
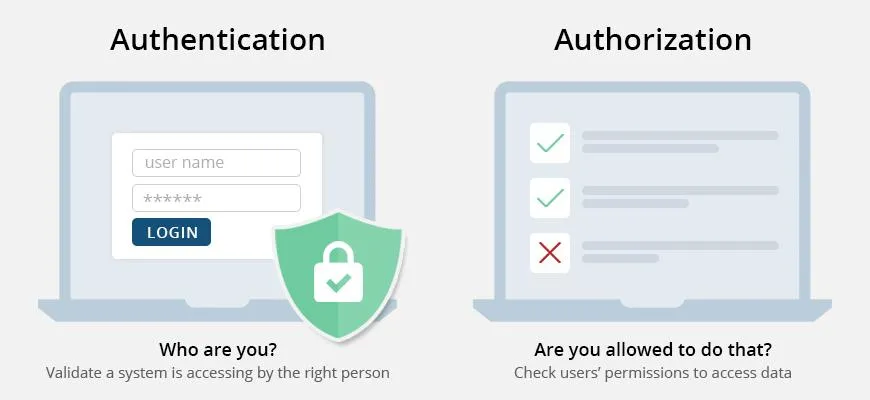
Prior to delving into best practices for API authorization, it’s imperative to grasp the disparity between two frequently conflated notions: authentication and authorization.
Authentication pertains to verifying identity, akin to confirming a user’s identity via a username, password, or biometric data.
Authorization, on the other hand, involves permitting access to resources or functionalities subsequent to identity confirmation. For instance, while authentication focuses on gaining entry through the front door, authorization dictates which areas and amenities the individual can avail themselves of within the premises.
API Authorization Best Practices.
Now that the significance of API authorization is clear, let’s explore some recommended practices to optimize its effectiveness.
1. Embrace Token-Based Authorization (JWT, OAuth Tokens): Token-based authorization, particularly utilizing JWT (JSON Web Tokens) and OAuth tokens, presents a secure and streamlined approach to manage API interactions. Consider the following advantages:
🗸 Tokens facilitate stateless authentication, eliminating the need for the server to maintain session states for individual users, thereby enhancing scalability.
🗸 They can be securely transmitted through various channels and are less vulnerable to CSRF attacks compared to traditional session-based authentication methods.
🗸 Tokens are interoperable across domains, making them well-suited for microservices architecture and single sign-on (SSO) systems.
🗸 Particularly OAuth tokens can encompass scopes and permissions, offering granular control over a user’s authorized actions.
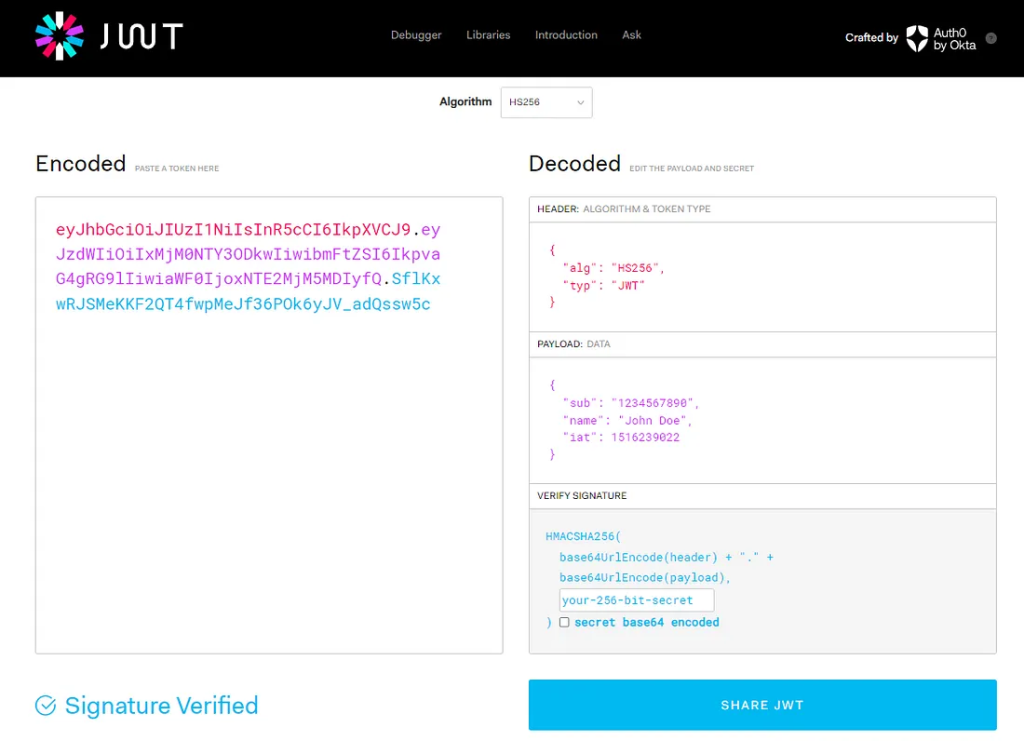
Implementing Token-Based Authorization with JWT: JWTs are typically generated post-successful user authentication. They encapsulate a payload containing user data and potentially their access privileges. You can utilize libraries such as jsonwebtoken in Node.js or PyJWT in Python for JWT authorization implementation.
To begin, you’ll need to generate the JWT token. Below is a sample approach using PyJWT:
import jwt
from datetime import datetime, timedelta

secret_key = 'YOUR_SECRET_KEY'
payload = {
    'sub': user_id,
    'iat': datetime.utcnow(),
    'exp': datetime.utcnow() + timedelta(days=1)
}

token = jwt.encode(payload, secret_key, algorithm='HS256')
Then, you need to validate each request to decide if the user is allowed the preform the request. The token is typically sent in the Authorization header of the each request. The server can decode the JWT using the secret key and validates it. If valid, the server processes the request; if not, it returns an error.
from flask import Flask, request, jsonify
import jwt
import datetime

app = Flask(name)
SECRET_KEY = "your_secret_key"  # Replace with your secret key

Sample route that requires token-based authorization
@app.route('/protected', methods=['GET'])
def protected():
    token = request.headers.get('Authorization')
    if not token:
        return jsonify({'message': 'Token is missing!'}), 403

    try:
        # Decoding the token
        data = jwt.decode(token, SECRET_KEY, algorithms=["HS256"])
        # You can use the data in the token as needed, for example:
        # user_id = data['user_id']

    except jwt.ExpiredSignatureError:
        return jsonify({'message': 'Token has expired!'}), 403
    except jwt.InvalidTokenError:
        return jsonify({'message': 'Invalid token!'}), 403

    # Token is valid, process the request
    return jsonify({'message': 'Token is valid! You have access to protected routes.'})
2. Implement Fine-Grained Access Control
Implementing Precise Access Management. Fine-grained access control is a security strategy that provides meticulous oversight of an application’s permissions and access privileges. It ensures that users or services are granted only the necessary access, aligning with the principle of least privilege.
How to Implement Fine-grained Access Control: Deploying fine-grained access control involves several key steps:
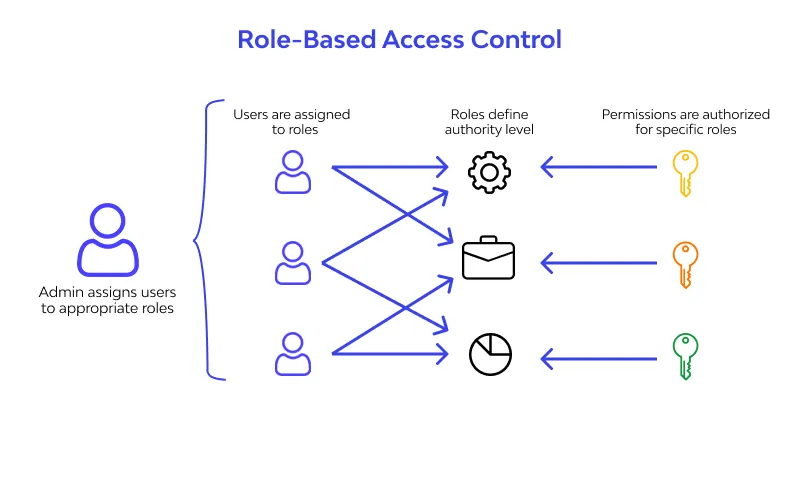
🗸 Define Roles and Permissions: Identify distinct user roles within your system and delineate the specific actions associated with each role.
🗸 Utilize Role-Based Access Control (RBAC): Implement RBAC, where access to resources is granted based on predefined roles, with each role assigned specific permissions.
🗸 Explore Attribute-Based Access Control (ABAC): For more intricate scenarios, consider ABAC, which bases access decisions on a combination of attributes such as user, resource, and environment. For instance, if your API grants different access levels to administrators and regular users, you can establish access control mechanisms using modular components that can be reused throughout your application.
For example, you can leverage tools like Bit to construct an autonomous authorizer component responsible for validating API requests.

It’s as simple as:
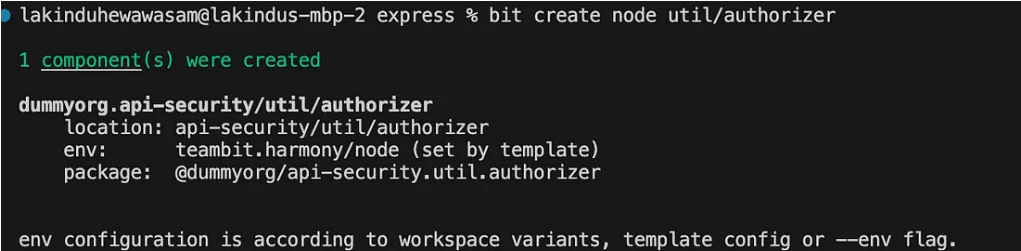
1.Creating a Node.js component named “authorizer” that enables you to execute your authentication logic with the following command:

If executed correctly, you will observe the following output:
Next, implement your authorizer logic:
export function authorizer(userId: string) {
// Implement logic to retrieve the user's role
if (userId === 'U001') {
return "admin";
}
return "customer"
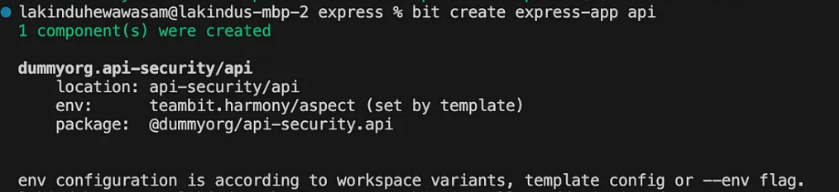
}Next, create an Express App using the command:

You’ll see the output:
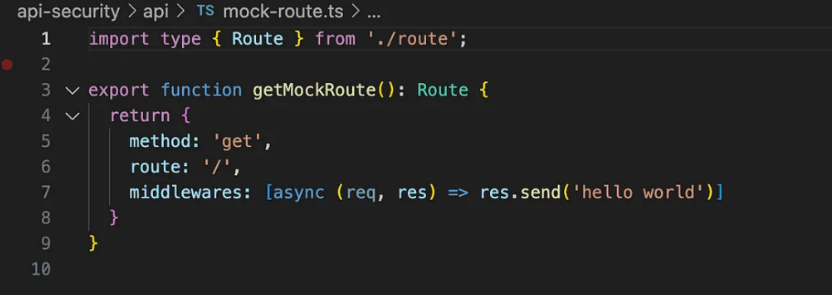
Next, let’s hook up the authorizer to the app by updating the mock-route.ts. Initially, you’ll see this:
Let’s add a new middleware:
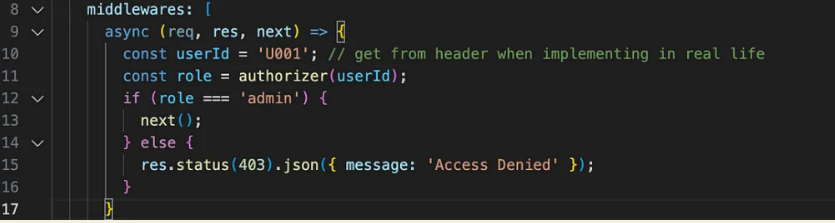
This will make sure your authorizer component runs before it invokes the actual business logic. After you run your API, you should see the following output:

By chaining functions, we’ve enforced role-based access control. The decorator checks if the user’s role matches the required roles for the endpoint. If not, it returns an access denied message.
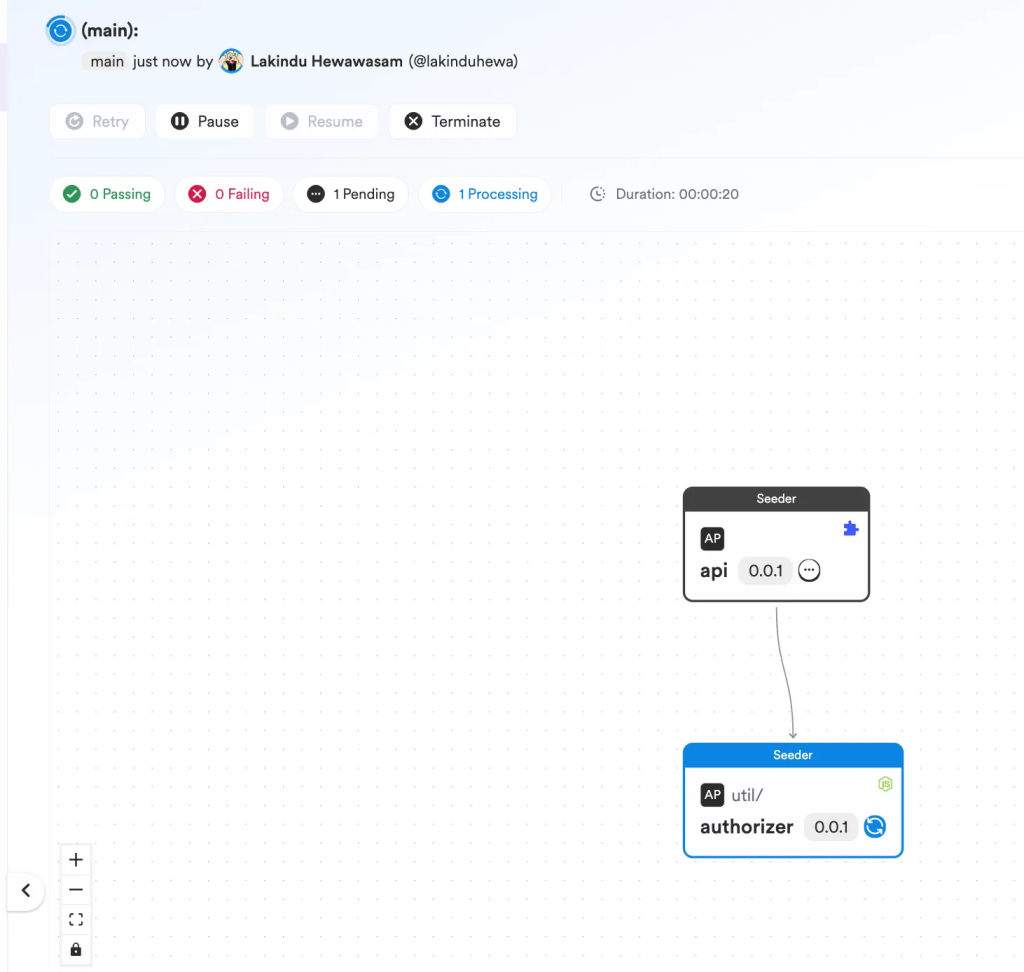
And, as you keep updating the authorizer logic and updating the app, Bit’s CI Server —Ripple CI automatically updates the changes across the tree.
API authorization is a critical aspect of ensuring the security and integrity of modern software systems. By adopting a comprehensive approach to API authorization, organizations can mitigate security risks and build trust with their users and partners.
Fill-in the form below to reach out to us with your project👇


